Guidelines
-
Use the Beam wall mount kit. You can buy it on www.sonos.com. Follow the instructions in the kit.
-
Keep 1" (25mm) space (minimum) above Beam so you can reach the touch controls.
-
If you’re mounting above the TV, make sure you can reach the touch controls.
-
For best sound quality, keep both ends of Beam at least 1' (30cm) from a wall or other obstruction.
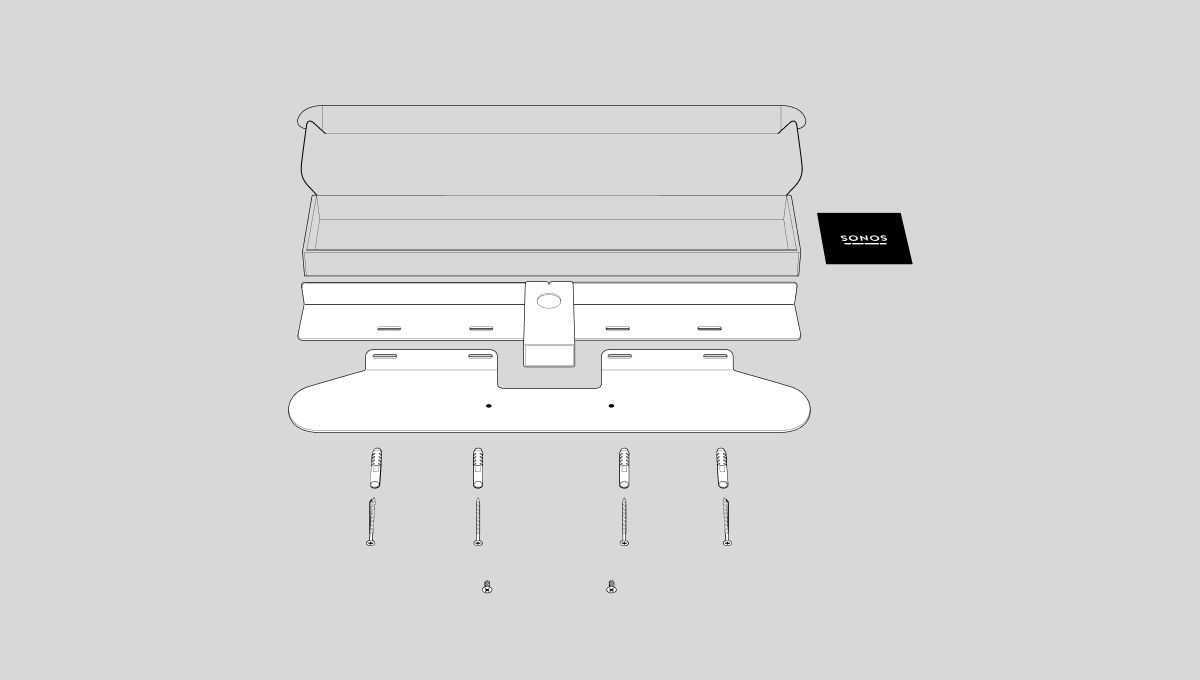
Mount kit contents
-
Wall mount bracket
-
4 wall anchors
-
4 wall screws
-
2 screws
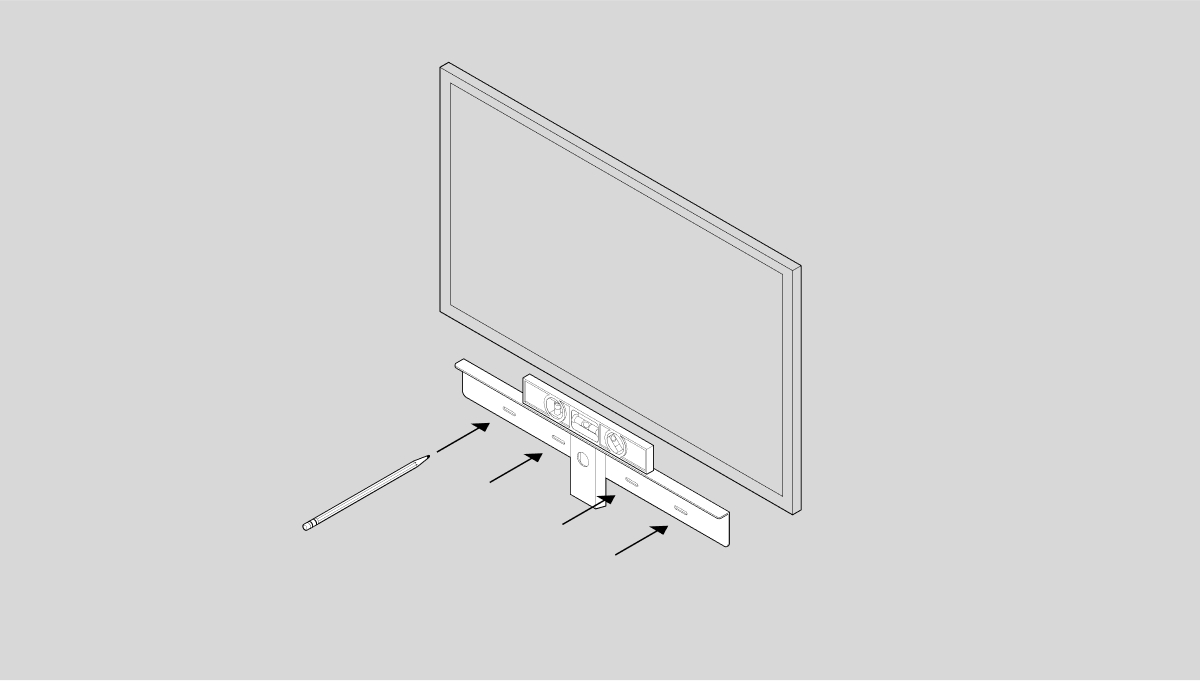
Note:Don’t discard the template. It may look like packing material.
-
Tape the cardboard template to the wall above or below your TV. Use a level. Keep 1" (25mm) space (minimum) for access to Beam’s touch controls. (Don’t install Beam vertically.)
-
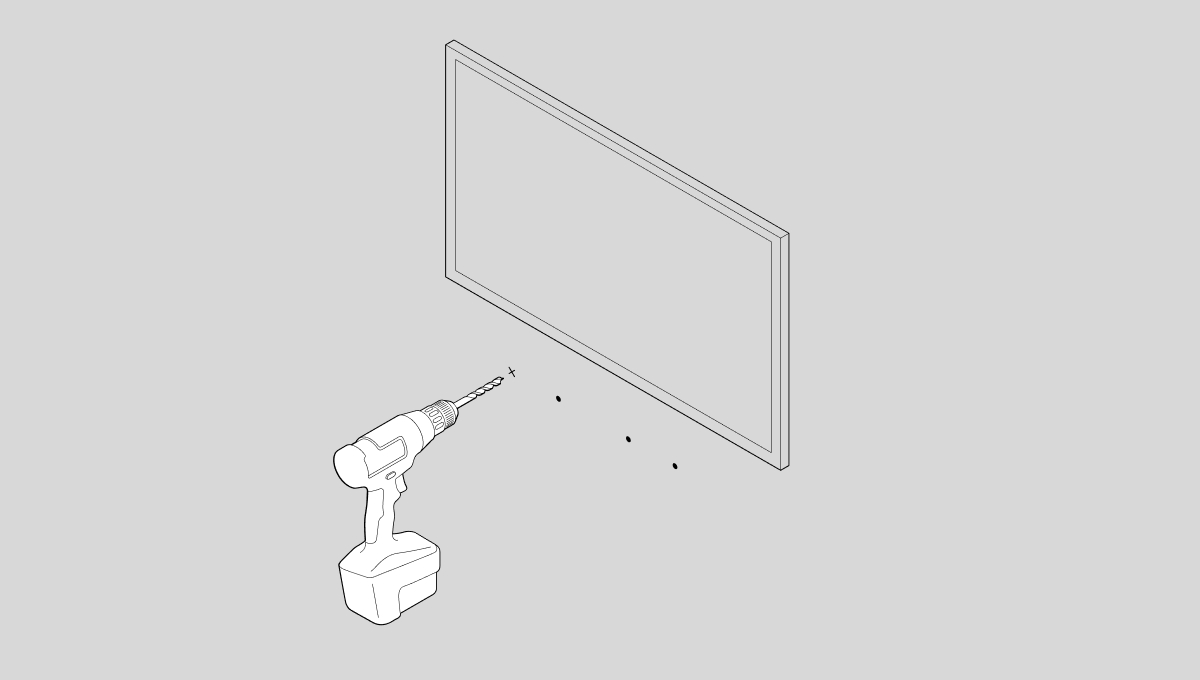
Mark the center of the mounting holes and remove the template.
-
Use a 5/16" drill bit to drill pilot holes (see Wall mounting information)
-
Insert and secure the wall anchors (don’t use the anchors if drilling into wood).
-
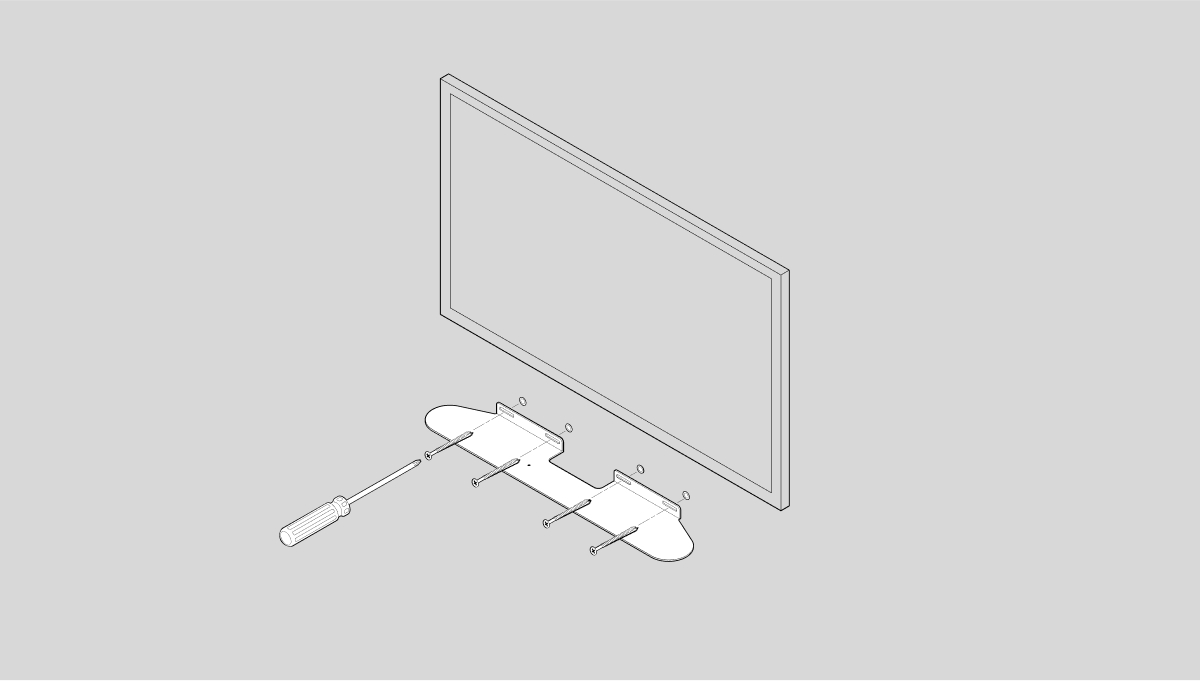
Place the bracket on the wall and loosely tighten the wall screws to secure the bracket. Check with a level and then tighten the screws.
-
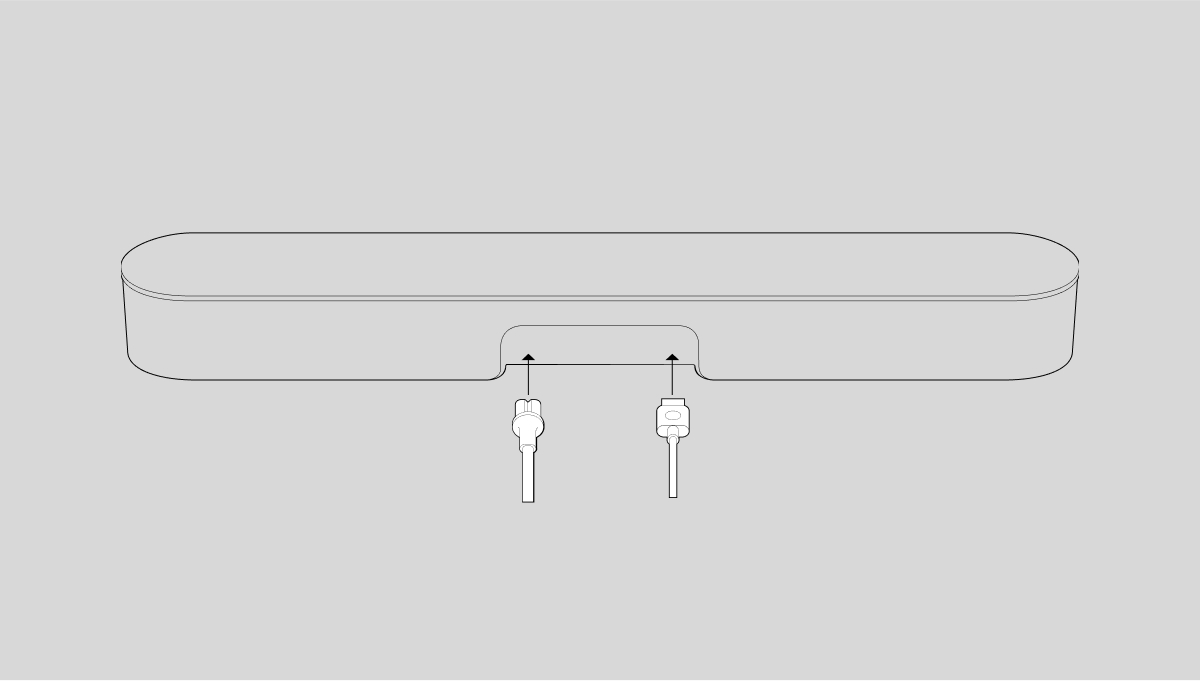
Connect the power and HDMI cables to Beam.
-
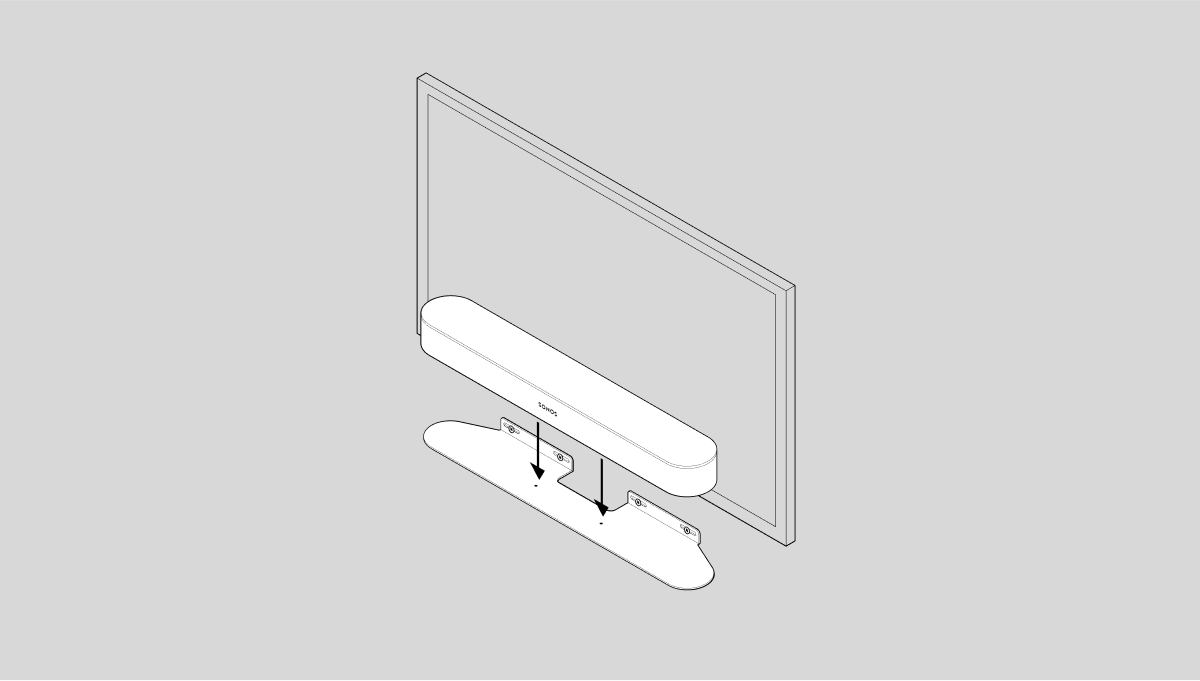
Place Beam on the bracket.
-
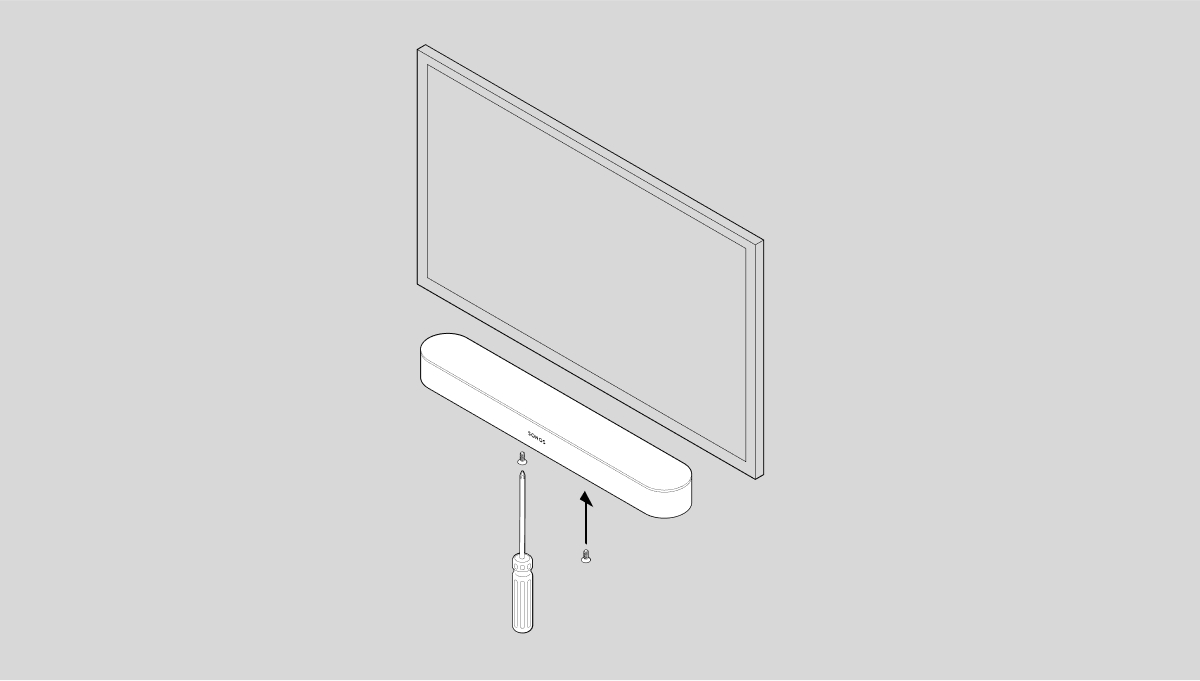
Insert and tighten Beam to the bracket using the mounting screws.

|
Wall Material |
Pre Drill |
Use Wall Anchors |
Use Screws |
|
Wood Stud |
1/8" / 3 mm bit |
No |
Yes |
|
Drywall (no stud) |
5/16" / 8 mm bit |
Yes |
Yes |
|
Hard wallboard or double board |
5/16" / 8 mm bit |
Yes |
Yes |
|
Plaster |
5/16" / 8 mm bit |
No, requires toggle bolt |
Yes |
|
Concrete or Brick |
5/16" / 8 mm bit |
Yes |
Yes |
|
Feature |
Description |
|---|---|
|
Audio |
|
|
Amplifier |
Five Class-D digital amplifiers. |
|
Elliptical Woofer |
Four full-range woofers ensures you’ll hear the faithful playback of mid-range vocal frequencies plus deep, rich bass. |
|
Tweeter |
One tweeter creates a crisp and clear high-frequency response. |
|
Microphones |
|
|
Voice Control |
Integrated voice control. |
|
System Requirements |
TV with HDMI ARC or optical digital audio output, broadband internet, and the Sonos app. |
|
Networking* |
|
|
Wireless Connectivity |
Connects to your home WiFi network with any 802.11 b/g/n router. 802.11n only network configurations are not supported—you can either change the router settings to 802.11 b/g/n or connect a Sonos product to your router. |
|
Ethernet Port |
One 10/100 Mbps Ethernet port. You can plug a Sonos product directly into your router if your WiFi is unstable. |
|
General |
|
|
Power Supply |
Auto-switching 100-240 V, 50-60 Hz 2.5A AC universal input. |
|
Dimensions (H x W x D) |
2.68 x 25.63 x 3.94 in. (68 x 651 x 100 mm) |
|
Weight |
6.2 lb (2.8 kg) |
|
Operating Temperature |
32°F to 104° F (0° C to 40° C) |
|
Storage Temperature |
-4°F to 122° F (-20° C to 50° C) |
|
Control |
Use your remote control, voice, touch controls or the Sonos app. |
|
Supported Devices |
Connects to TV with HDMI cable (with or without an attached optical adapter). Plays sources connected to the TV, including cable boxes and game consoles. |
|
Package Contents |
Beam, AC power cord, HDMI cable, optical adapter, Quickstart Guide. |
* Specifications subject to change without notice.
|
1.Read these instructions. |
|
2.Keep these instructions. |
|
3.Heed all warnings. |
|
4.Follow all instructions. 5.If your product is wallmounted:
|
|
6.Do not use this apparatus near water. |
|
7.Clean only with dry soft cloth. Household cleaners or solvents can damage the finish on your Sonos components. |
|
8.Do not block any ventilation openings. Install in accordance with the manufacturer’s instructions. |
|
9.Do not install near any heat sources such as radiators, heat registers, stoves, or other apparatus that produce heat. |
|
10.Protect the power cable from being walked on or pinched, particularly at plugs, convenience receptacles, and the point where they exit from the apparatus. |
|
11.Only use attachments/accessories specified by the manufacturer. |
|
12.Unplug this apparatus during lightning storms or when unused for long periods of time. |
|
13.Refer all servicing to Sonos qualified service personnel. Servicing is required when the apparatus has been damaged in any way, such as power-supply cable or plug is damaged, liquid has been spilled or objects have fallen into the apparatus, the apparatus has been exposed to rain or moisture, does not operate normally, or has been dropped. |
|
14.The Mains plug should be readily available to disconnect the equipment. |
|
15. |
|
16.Do not expose apparatus to dripping or splashing and do not place objects filled with liquids, such as vases, on the apparatus. |
